Blog
How To Create Registration Forms In HTML
Learning the basics of web development is often the first step in making a good online profile. Making a registration form in HTML is an important skill. This step-by-step guide will make it easy for you, even if you have never done it before.
Why Should You Use HTML for registration Forms? HTML is the building block of web design; it lets you make forms that can be changed, and that people can interact with. Using HTML for your registration forms makes sure that they can be seen and used on any device.
To sum up How to Make an HTML Registration Form:
Getting your space ready Set up your HTML tool before you start writing code. No matter if it is a simple Notepad or a more complex IDE, make sure you know how to use it.
Putting together the basic structure Start with the layout of HTML. This includes setting the HTML, Head, and Body tags and saying what kind of text it is.
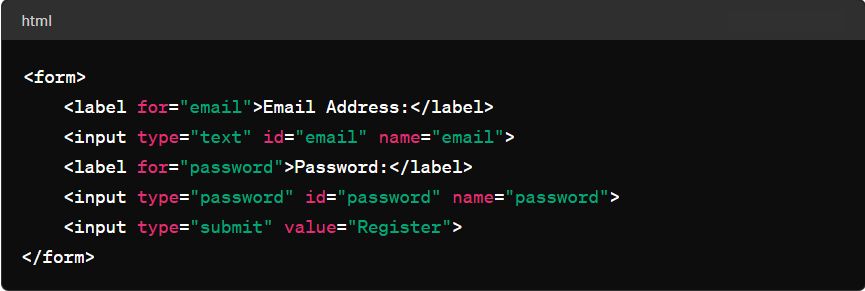
Making the shape What’s on your form lives in the <form> element. Choose the action (where to send form data) and method (GET or POST) for your form. <input> tags let you add text boxes, password forms, and submit buttons, among other things. Make sure to use <label> tags with them so that everyone can see them.
Getting users to interact more Adding distinct types of input fields, like email, date, and number fields, will make the user experience better by letting you get the info you need. Placeholders can help users figure out what to type.
Putting together your shape You can use CSS to style your form so that it looks good and is easy to use. To make sure your form works on phones, think about unique styles for different devices.
Sign up for Munshify Form to make your life easy. It lets you make beautiful, smart forms in seconds without writing any code.
Testing and deploying: Once you are done making your form, make sure it works and looks good on all browsers and devices by testing it on a variety of them. After testing the form, put it on your website to start getting information from people who use it.
There is a detailed, step-by-step process for making an HTML registration form:
Step 1: Pick an HTML editor Pick an HTML tool that works for you. Plain text editors, like TextEdit or Notepad, are all you need for simple jobs. If you want more features, you might want to investigate advanced tools that can find errors, complete your sentences automatically, highlight syntax, and search and replace.
Step 2: Make an HTML file. Start a new file in the editor of your choice and save it with an.html ending, like registrationform.html. This is the paper you will use.
Step 3: Get ready The Basics of HTML Start with the basics of HTML:
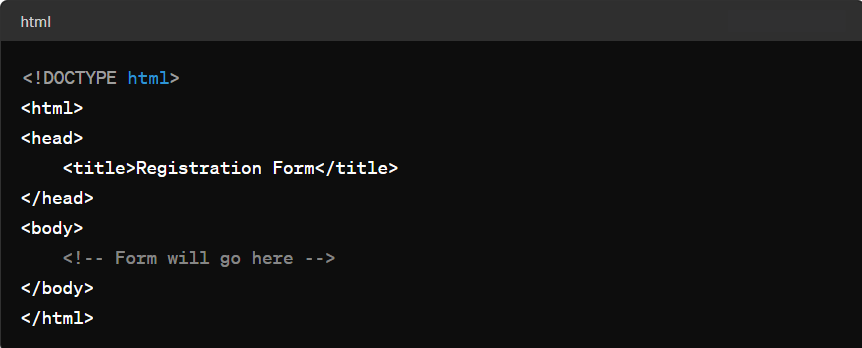
Step 4: Add Form Elements Add parts to the form Add a <form> element where you want to put the input boxes.
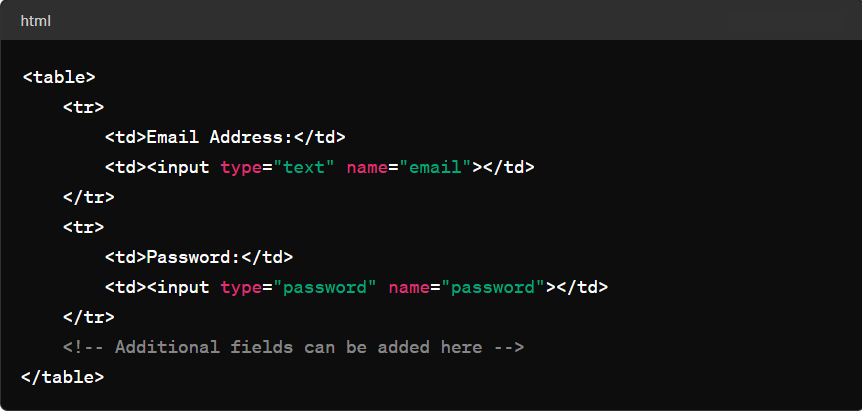
Step 5: Organize Form Layout Set up the layout of the form to set up your form, you could use a <table> to position the fields.
If writing code from scratch seems hard, Munshify Forms is a straightforward way to get started. It has a drag-and-drop option that makes it easy to make registration forms and handle back-end tasks. This makes it simple to add to any website without needing to know a lot about HTML.
These steps show you how to make a simple HTML registration form, from setting up the file to arranging form parts so that users can interact with them easily. For more complicated forms or better features, you will need to know more HTML and CSS.
We are located at

eReleGo Technologies Pvt Ltd
646, 52, 12th Main Rd,
2nd Block, Rajajinagar,
Bengaluru, Karnataka 560010