After linking all the accounts, the next step for the user is to create organic posts.
Users can link their accounts to manage their campaigns from the left side of the screen.
If the user has not published any posts yet, they can create one and publish it across multiple platforms simultaneously by clicking on ‘Create Post’.
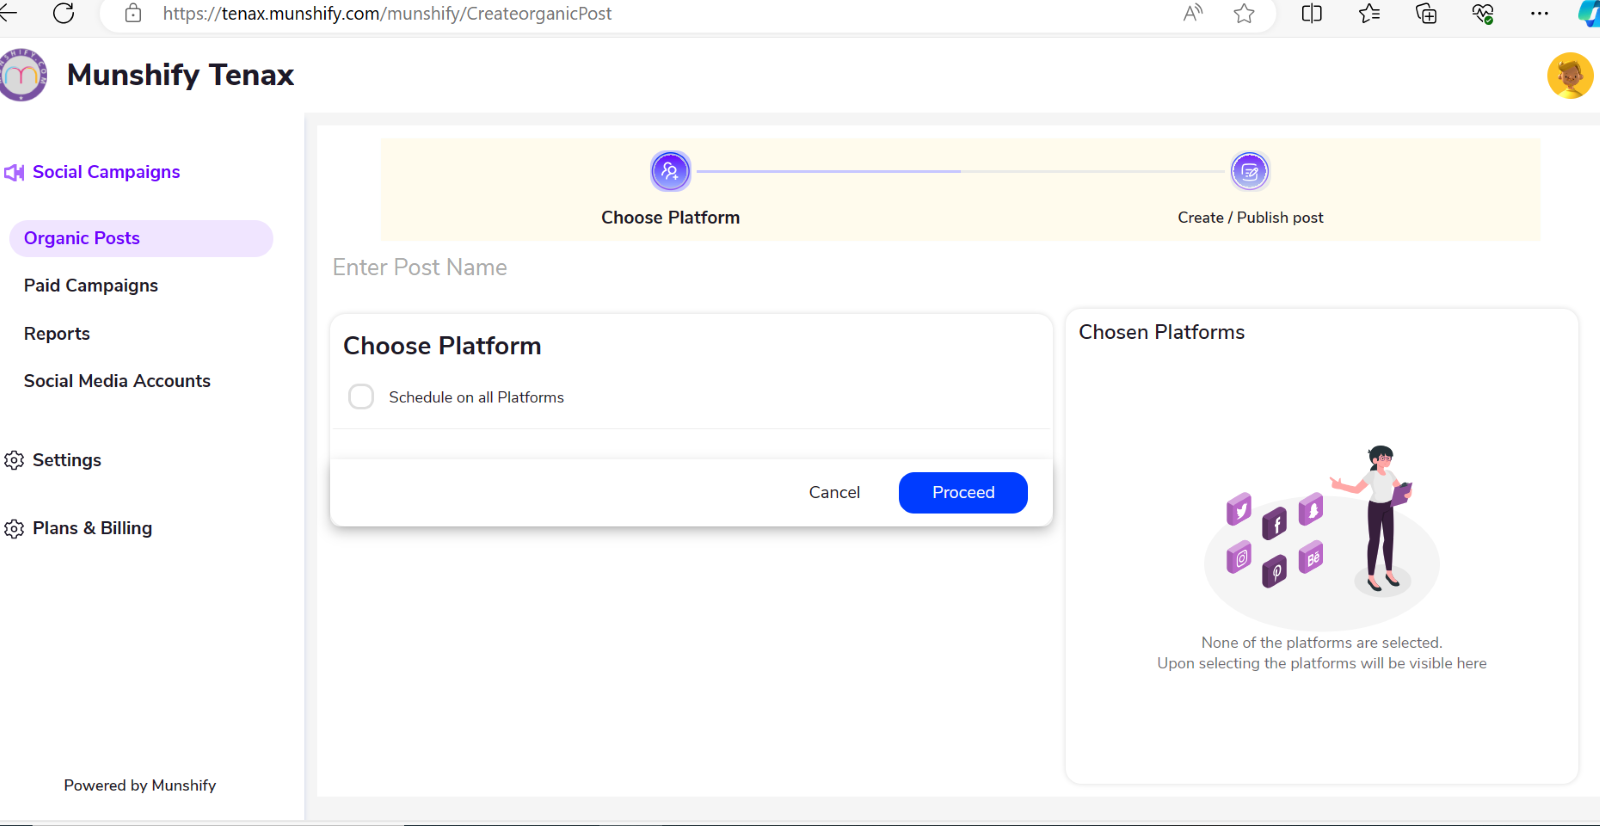
When the user clicks on “Create Post,” the following screen will be displayed:
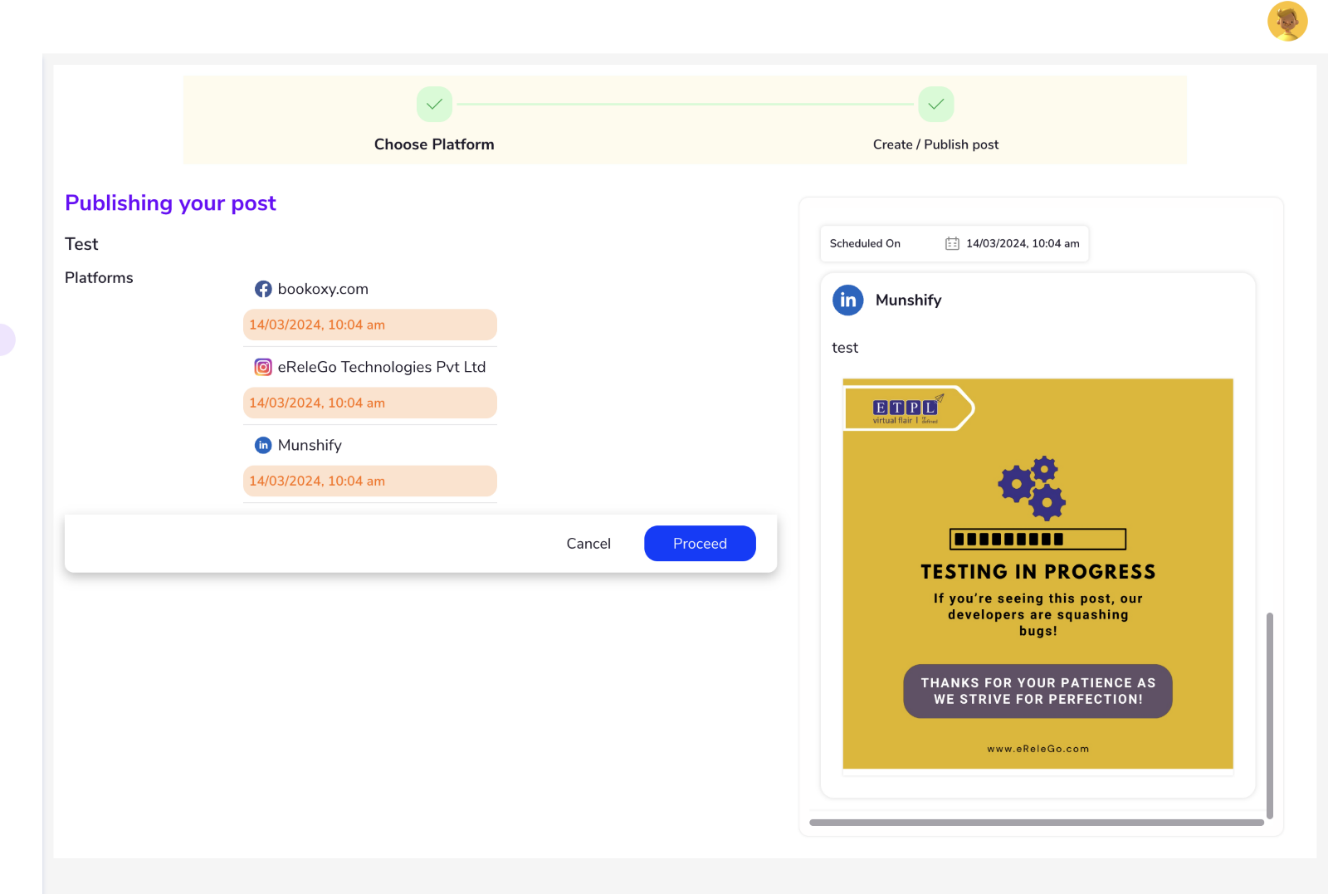
Choose Platform
Enter the post name:
– Input the title or name of the post.
Choose the platform:
– Select the social media platforms.
Schedule on all platforms:
– Set the date and time for each platform.
Display of selected platforms:
– Platforms will be shown in the left corner.
Users have the option to pick which social media platforms they want their posts to appear on. This allows them to customize their audience and reach.
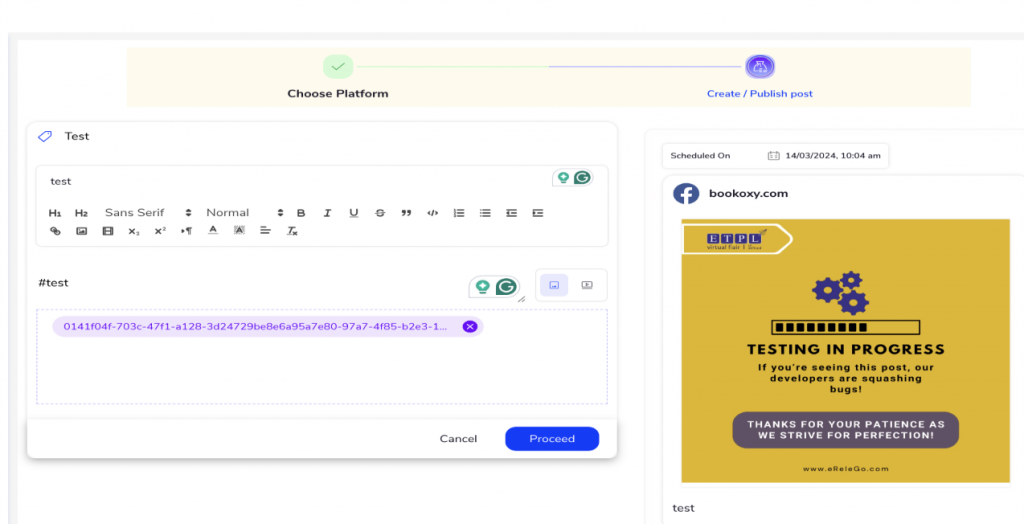
Create/Publish Post:
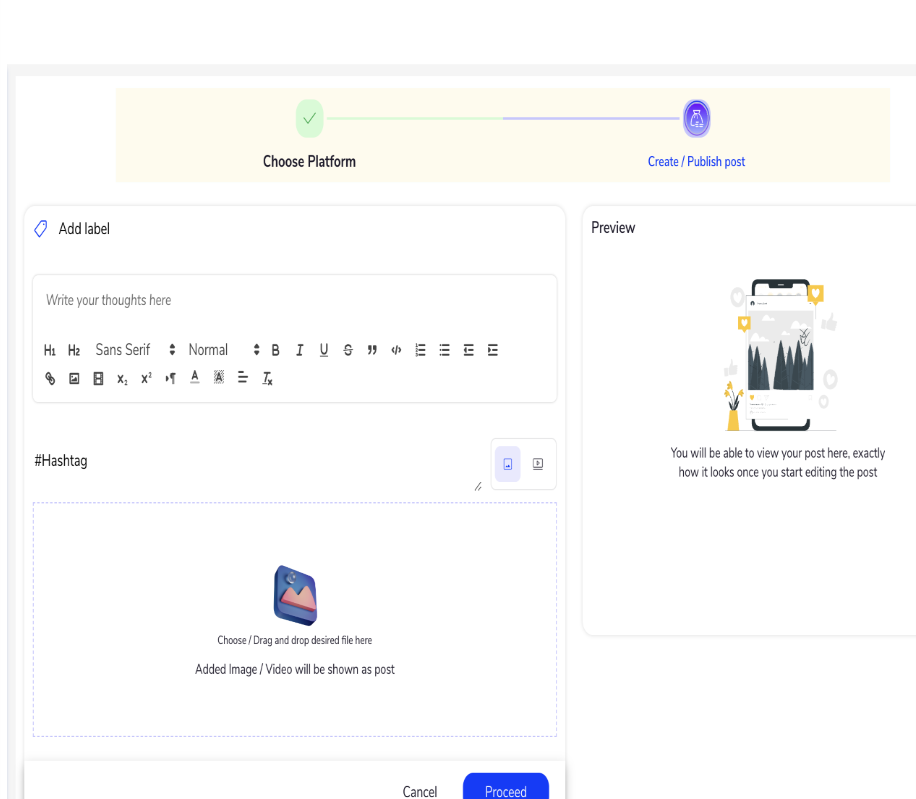
Adding Labels: Users can categorize their organic posts by adding labels. This helps in organizing and sorting posts based on different criteria.
Creating Hashtags: Users have the option to generate hashtags for their posts. Hashtags are keywords or phrases preceded by the ‘#’ symbol, which help in categorizing and increasing the visibility of posts on social media platforms.
Viewing Post: Users can preview the posts they’ve created in either mobile or desktop view. This allows them to see how their posts will appear on different devices and adjust them accordingly for optimal presentation.
Creating Posts: Users can compose their posts using the available features located at the top of the screen. These features may include text formatting options, media upload buttons, and other tools to enhance the post.
File Upload: Users can either create posts directly using the available features or drag and drop desired files, such as images or videos, into the provided space. Any added images or videos will be displayed as part of the post.
Post Preview: A preview of the post created will be displayed in the right corner of the screen. This allows users to review the appearance and content of the post before proceeding further.
Proceed Button: After creating and reviewing the post, users need to click on the “Proceed” button to finalize the post. This action likely triggers the post to be scheduled for publishing or saved as a draft, depending on the platform’s functionality.
Users can set a specific date and time for their posts to be published. This feature lets them plan and coordinate their content release schedule.
If users want their posts published on all available platforms, they can do so with just one selection. This simplifies the process and saves time.
In case users need to make changes to the scheduled publication time or date, they can easily do so. This provides flexibility and adaptability to their posting schedule.
The social media platforms chosen by the user will be visibly displayed in the right corner of the screen. This serves as a reminder of the selected platforms and helps users keep track of their choices.
After Choosing the Platforms user needs to create/ Publish post by using the given space
After users have created their post and attached any images or videos, they will see previews of how the post will look on their selected social media platforms. These previews will appear in a layout like the two screens described below. Once users have reviewed and possibly modified their post, they must click the “Proceed” button. This action finalizes the post and triggers its publication to the chosen platforms.
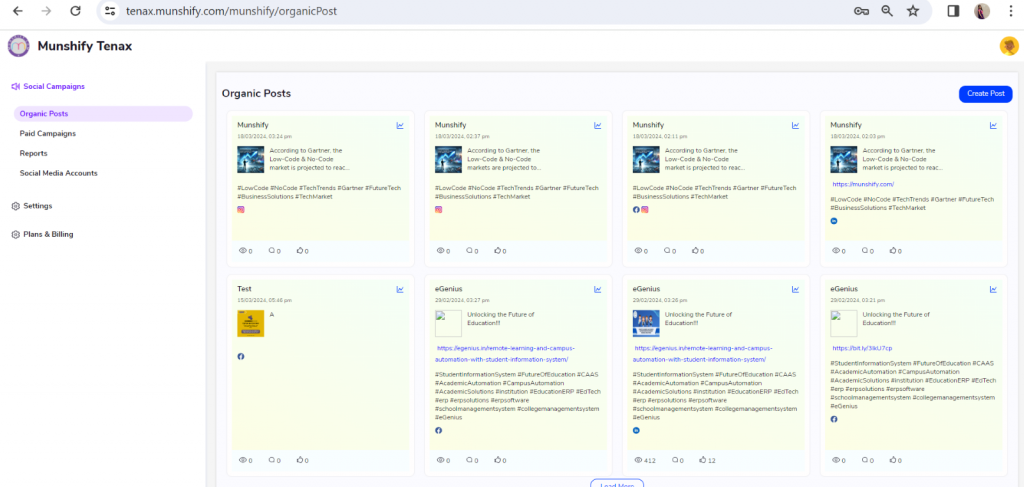
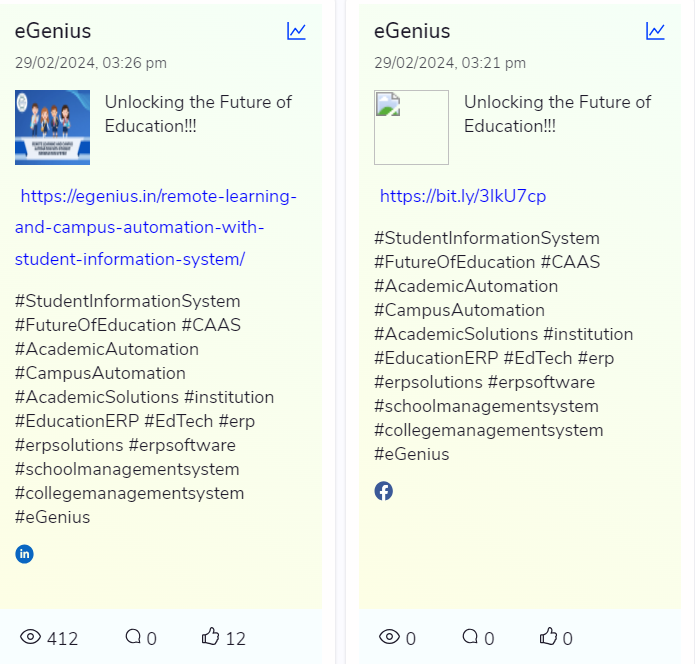
After the campaign is published, the posts will be displayed on the screen.
Welcome to Munshify — your all-in-one AI-first Low Code No Code platform to build apps, automate workflows, and manage your entire business from a single place.
To show you the most relevant solutions, please tell us who you are.
Just now
Welcome to Munshify.
Startup
What is the primary challenge you are looking to solve right now?
Just now
Welcome to Munshify.
Enterprise
What is the primary challenge you are looking to solve right now?
Just now
Welcome to Munshify.
Digital Solutions
What is the primary challenge you are looking to solve right now?
Just now
Great! We have an AI-powered solution tailored specifically for your requirement.
To get started, please share your basic details.
Just now
A few more details to help us serve you better.
Just now
Optional
Optional
Something went wrong. Please try again.
I Just Want to See a Live Demo
We'd love to walk you through a personalized live session of the Munshify platform.
To get started, please share your basic details.
Just now
A few more details to help us prepare the right demo for you.
Just now
Optional
Optional
Something went wrong. Please try again.
Thank you! Your details have been received successfully.
One of our AI product experts will reach out to you within the next 2 business hours to understand your requirements and walk you through the best-fit solution.
In the meantime, explore what Munshify has to offer.
Just now
Need to connect right away?
Thank you! Your details have been received successfully.
One of our AI product experts will contact you within the next 2 business hours to schedule and personalize your live session.
In the meantime, explore what Munshify has to offer.


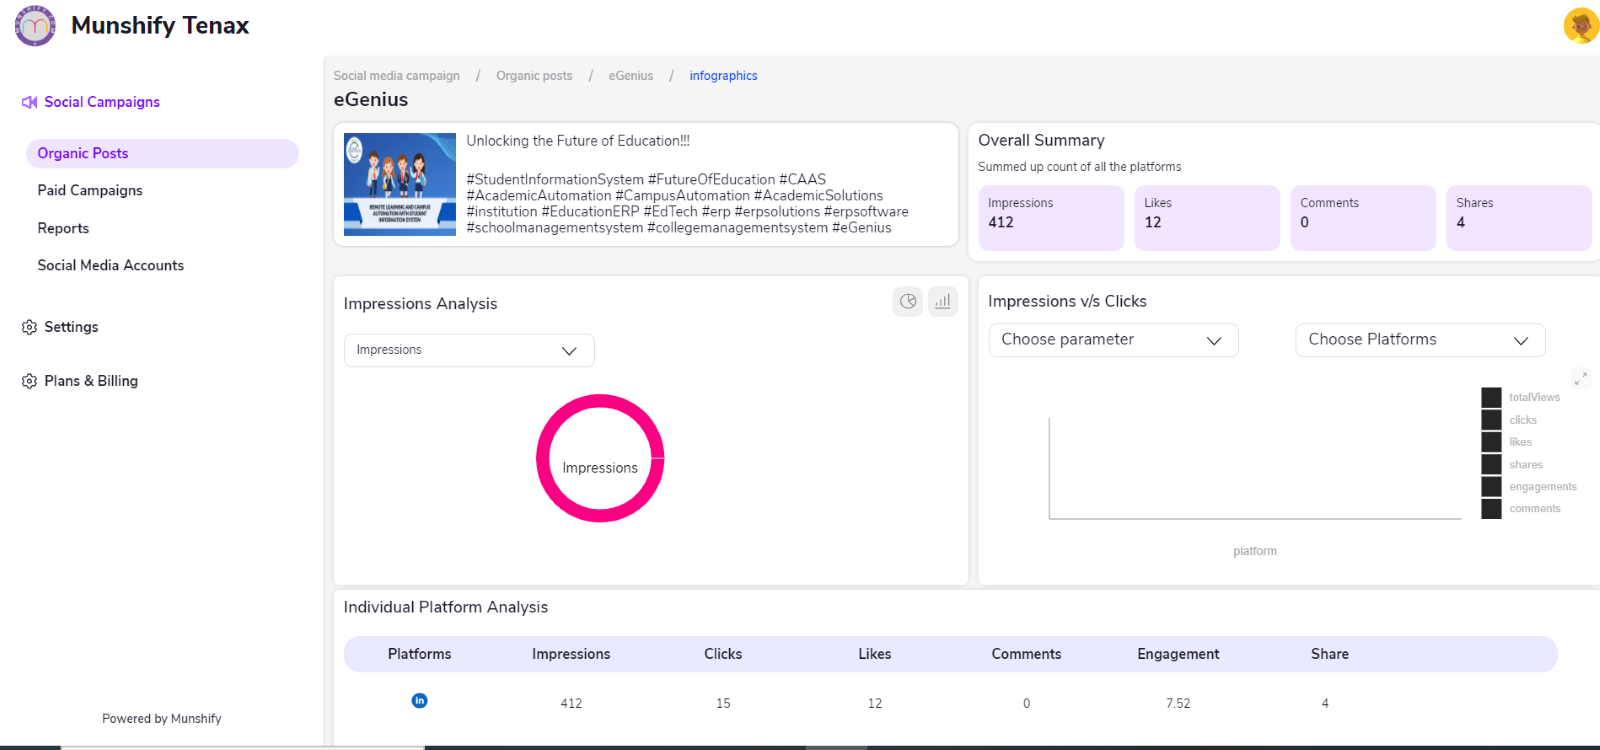
 i.e Analytics the screen will showcase like below